How To Access IoT Behind Router With Raspberry Pi Example
So listen up, tech enthusiasts and IoT wizards! If you're looking to dive deep into the world of accessing IoT devices behind a router using Raspberry Pi, you're in the right place. This article is your ultimate guide to setting up, configuring, and troubleshooting your IoT network. Whether you're a beginner or an advanced user, this step-by-step journey will give you the tools and knowledge you need to make it happen. Let's get started, shall we? oh yeah, and don’t forget to bookmark this page because it’s gonna be your go-to resource!
Before we jump into the nitty-gritty of how to access IoT behind router Raspberry Pi example setups, let’s take a moment to understand why this matters. In today’s connected world, IoT devices are everywhere—smart thermostats, security cameras, smart home gadgets, and more. But what happens when these devices are locked behind your router's firewall? How do you make sure they’re accessible from anywhere? That’s where our trusty Raspberry Pi comes in!
Now, let’s talk about the keyword of the day: access IoT behind router Raspberry Pi example. This isn’t just some random tech jargon; it’s a powerful concept that can unlock the full potential of your IoT ecosystem. By the end of this article, you’ll know exactly how to set up a secure and reliable connection, keeping your devices safe while giving you the freedom to control them remotely. Ready? Let’s roll!
- Jamelizzzz Xxx Erome A Comprehensive Exploration Into Her Digital Fame
- Peter Mcmahon Health The Untold Story Behind His Wellness Journey
What You Need to Get Started
Alright, let’s break down the basics. Before you dive headfirst into the deep end, you’ll need a few things to get started. Don’t worry, most of this stuff is pretty standard in the tech world, and if you’re already into IoT or Raspberry Pi, chances are you’ve got most of this lying around.
Here’s your shopping list:
- Raspberry Pi (any model will do, but Pi 4 is recommended)
- A stable power supply for your Raspberry Pi
- MicroSD card with Raspberry Pi OS pre-installed
- Router with port forwarding capabilities
- An IoT device you want to access remotely (could be anything from a smart bulb to a weather station)
- A static IP address for your Raspberry Pi
- Optional: A domain name for easier access
Now, these items might sound fancy, but trust me, they’re not as complicated as they seem. For example, setting up a static IP address is as easy as tweaking a few settings on your router. And Raspberry Pi OS? You can download it for free and flash it onto your MicroSD card in no time. Easy peasy!
- Alice Rosenblum Leaked Onlyfans The Untold Story You Need To Know
- Alice Rosen Blum Leaked The Story Behind The Headlines
Understanding the Basics of IoT Networking
Before we dive into the technical aspects, let’s take a moment to understand the basics of IoT networking. This is crucial because it’ll help you troubleshoot any issues that might pop up along the way.
What is IoT?
IoT, or the Internet of Things, refers to the network of physical devices embedded with sensors, software, and connectivity, allowing them to exchange data. These devices can range from simple gadgets like smart lightbulbs to complex systems like industrial machinery. The key idea here is connectivity—these devices talk to each other and to the internet, enabling automation, data collection, and remote control.
Why Use Raspberry Pi for IoT?
Raspberry Pi is a tiny but mighty computer that’s perfect for IoT projects. It’s affordable, energy-efficient, and highly customizable. Plus, it runs on Linux-based operating systems, making it a dream for developers and hobbyists alike. With Raspberry Pi, you can set up servers, manage networks, and even act as a gateway for your IoT devices.
Router Basics for IoT Access
Your router is the gatekeeper of your home network. It controls which devices can access the internet and how they communicate with each other. When you’re trying to access IoT devices behind a router, you’ll need to configure your router to allow external connections. This usually involves setting up port forwarding, which we’ll cover in more detail later.
Setting Up Your Raspberry Pi
Alright, let’s get our hands dirty! The first step in accessing IoT behind a router with Raspberry Pi is setting up your Raspberry Pi itself. This might seem intimidating, but trust me, it’s not as hard as it sounds.
Installing Raspberry Pi OS
Start by downloading the Raspberry Pi Imager from the official Raspberry Pi website. Once you’ve got that, plug your MicroSD card into your computer and use the Imager to flash the latest version of Raspberry Pi OS onto it. Once that’s done, pop the card into your Raspberry Pi and boot it up. Voila! You’re ready to roll.
Configuring Static IP
Next up, you’ll want to assign a static IP address to your Raspberry Pi. This ensures that your Pi always has the same address on your network, which is crucial for setting up port forwarding later on. To do this, open the Raspberry Pi Configuration tool, head to the Network tab, and set a static IP. Simple, right?
Enabling SSH
SSH, or Secure Shell, allows you to remotely access your Raspberry Pi from another computer. This is super handy if you want to manage your Pi without physically being near it. To enable SSH, simply open the terminal on your Pi and type:
sudo raspi-config
Then navigate to Interfacing Options, select SSH, and enable it. Done!
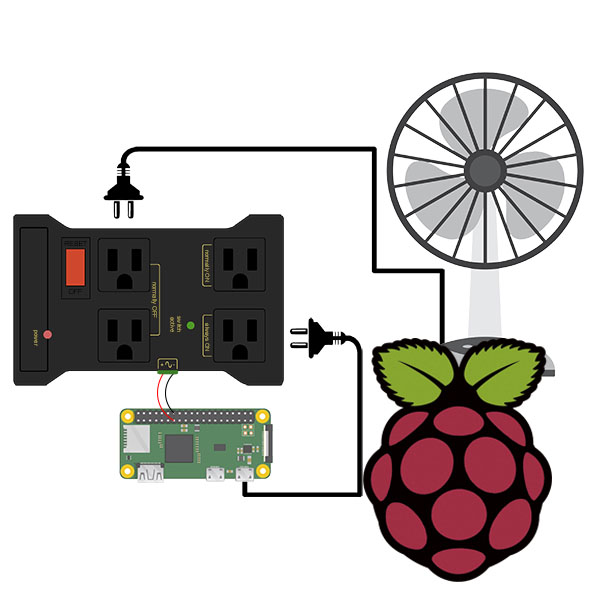
Connecting IoT Devices to Raspberry Pi
Now that your Raspberry Pi is all set up, it’s time to connect your IoT devices. This is where the magic happens!
Wi-Fi vs Ethernet
First, decide how you want to connect your devices. Wi-Fi is convenient and wireless, but Ethernet offers faster and more reliable connections. If your IoT devices support both, go with Ethernet for the best performance. If not, Wi-Fi will do just fine.
Setting Up Device Communication
Once your devices are connected to the same network as your Raspberry Pi, you’ll need to set up communication between them. This usually involves installing software or libraries that allow your Pi to interact with your devices. For example, if you’re using MQTT for messaging, you’ll need to install an MQTT broker like Mosquitto on your Pi.
Testing the Connection
Before you move on, test the connection between your Raspberry Pi and your IoT devices. Use simple commands or scripts to send data back and forth. If everything’s working as it should, you’re ready to move on to the next step!
Configuring Router for Remote Access
Now comes the tricky part: configuring your router to allow remote access to your IoT devices. This is where port forwarding comes into play.
What is Port Forwarding?
Port forwarding is a technique that allows you to direct traffic from the internet to a specific device on your local network. For example, if you want to access your Raspberry Pi from outside your home network, you’ll need to forward a specific port to your Pi’s IP address.
How to Set Up Port Forwarding
Here’s how you can set up port forwarding on your router:
- Log in to your router’s admin interface (usually by typing its IP address into your browser)
- Find the port forwarding section (this might be under Advanced Settings or similar)
- Add a new rule, specifying the port number and the IP address of your Raspberry Pi
- Save the changes and restart your router
And just like that, you’ve opened the door for remote access!
Securing Your IoT Network
Security is a big deal when it comes to IoT, especially if you’re allowing remote access. The last thing you want is some random hacker gaining control of your smart home devices. Here’s how you can keep your network safe:
Using Strong Passwords
Never use weak or default passwords for your devices. Always create strong, unique passwords and change them regularly. It’s a simple step, but it can make a huge difference in protecting your network.
Implementing Firewall Rules
Your router’s firewall is your first line of defense. Make sure it’s enabled and configured to block any unnecessary traffic. You can also use software firewalls on your Raspberry Pi for added protection.
Regularly Updating Software
Keep all your devices and software up to date. Manufacturers frequently release updates that patch security vulnerabilities, so staying current is crucial.
Advanced Tips and Tricks
Once you’ve got the basics down, you can start exploring some advanced features to take your IoT setup to the next level.
Setting Up a Domain Name
Instead of remembering a long IP address, you can set up a domain name for your Raspberry Pi. This makes it easier to access your devices from anywhere. Services like No-IP or DuckDNS offer free dynamic DNS solutions that work great for this purpose.
Automating Tasks with Scripts
Use scripts to automate repetitive tasks, like checking the status of your devices or sending alerts when something goes wrong. Python is a great language for this, and there are tons of libraries available to help you get started.
Monitoring Network Traffic
Keep an eye on your network traffic to detect any suspicious activity. Tools like Wireshark or tcpdump can help you analyze and monitor traffic in real-time.
Common Issues and Troubleshooting
Even the best-laid plans can go awry sometimes. Here are a few common issues you might encounter and how to fix them:
- Device Not Connecting: Double-check your Wi-Fi credentials or Ethernet connection.
- Port Forwarding Not Working: Ensure your router supports port forwarding and that you’ve entered the correct IP and port numbers.
- Security Alerts: If you’re seeing unusual activity, check your firewall logs and update your passwords immediately.
Conclusion
And there you have it, folks! You’ve now learned how to access IoT behind router Raspberry Pi example setups. From setting up your Raspberry Pi to configuring your router and securing your network, you’re armed with the knowledge to create a powerful and reliable IoT ecosystem. Remember, the key to success is persistence and a willingness to learn. So keep experimenting, keep tweaking, and most importantly, have fun!
Oh, and don’t forget to share this article with your fellow tech enthusiasts. The more people who understand how to harness the power of IoT, the better! Also, feel free to leave a comment below if you have any questions or suggestions. We’d love to hear from you!
Table of Contents
- How to Access IoT Behind Router with Raspberry Pi Example
- What You Need to Get Started
- Understanding the Basics of IoT Networking
- Setting Up Your Raspberry Pi
- Connecting IoT Devices to Raspberry Pi
- Configuring Router for Remote Access
- Securing Your IoT Network
- Advanced Tips and Tricks
- Common Issues and Troubleshooting
- Conclusion


Detail Author:
- Name : Emilia Huel V
- Username : johnson.swaniawski
- Email : tyshawn42@rippin.com
- Birthdate : 1993-04-13
- Address : 547 Malvina Plain Wunschchester, IN 07229
- Phone : 1-283-507-5315
- Company : Kassulke, Waelchi and Crooks
- Job : Preschool Teacher
- Bio : Animi optio adipisci qui ut. Eaque accusamus inventore ut et et. Totam earum sed reprehenderit soluta laudantium. Consequatur temporibus vel quia et.
Socials
linkedin:
- url : https://linkedin.com/in/lkoepp
- username : lkoepp
- bio : Quae qui qui facilis qui quasi.
- followers : 3322
- following : 2954
instagram:
- url : https://instagram.com/ludie8139
- username : ludie8139
- bio : Ut at pariatur magni eveniet ut est. Dolores beatae explicabo expedita at saepe.
- followers : 1954
- following : 2867
